Wednesday, July 3, 2013

CARDS FOR CHURCH

The following are cards I've made for the children in my church who have birthdays coming up:


Tuesday, May 21, 2013

I really like the way this card turned out.  I started with a free-online image, colored it, and then printed it again and cut out the dinosaur.  I colored the 2nd image of the dinosaur and then ran it through an embossing folder  The little dinosaur was a separate image that I colored, cut out, and ran through the same embossing folder.

Friday, April 19, 2013

A card for a little 7 year old at church.  I used a free online image.  Added some background paper, and some flowers.  Added a flower to the hat and then raised up the hat.  A pretty simple little card.  I love the blue and yellow combination.

Saturday, March 30, 2013

HAPPY BIRTHDAY TODD!

I just made this card today for my son Todd's birthday as I know he loves the mountains.  He will be 43 on April 2nd!  WoW!!!  I was just thinking back to when he was really little and I couldn't wait until he was 3 so I could hold a real conversation with him.  Well...I got what I asked for, and here we are now 40 years later!!!  It's funny though, because he's the one who calls me a LOT when he's on his way to/from work.  Sometimes we talk about TONS of stuff and other times, not as much, but either way, I really enjoy his calls.  He's a GREAT son!  :)  
Remember the $.01 gumballs?  WoW, I'm dating myself!  
This card is for a little boy at church.  Pretty simple online image.  I raised up a few of the gumballs and added some verbiage around the outside edge of the card.
Another card for a boy at church who's turning 14 years old this month

Sunday, March 24, 2013

LUV LUV LUV the little flowers on this card!  
I went to the Scrapbooking Expo in Pleasanton, California a couple of weeks ago and this was my favorite find:  Rolled Flower Dies (I don't think this is the real name of them).  They are made by Impression Obsession Rubber Stamps.  The largest die is approximately 1" in diameter and the smallest about 1/2" in diameter.  There are 5 different dies in the set.  They are sooooo cute!  I've seen other companies who make the rolled flower dies, but they're usually a LOT bigger than these.  When I first bought them I thought maybe they might be too small, but as I found out they're PERFECT!  I was able to send this card through the mail without too much bulk that would require extra postage.  I embossed the white layer with an embossing folder, then cut a hole with a Spellbinders circle die, and added a sheet of background paper behind it.  I then added a die cut butterfly made by Cheery Lynn Designs, Exotic Butterfly small #2 die (#DL113) and added a few seed beads to its body.  

GET WELL PHYLLIS!

This card was made for my friend, Pill (That's what I call her.)!  She was recently hospitalized with what turned out to be "Valley Fever!"  WOW!!!  Who'da thunk?  I read about Valley Fever online and it says that 5% of people who contract the disease get lesions in the lung.  Well, she had the lesions and until after the surgery we didn't know whether or not she had lung cancer.  Praise God for people who pray!  We believed in God's favor for her and He came through for her!  
I printed out a free-online-pocket template onto floral background paper.  Then I added the flowers. I also cut tissues into quarters, stamped 'Get Well' on them, along with some little flowers, and tucked them into the pocket.  The flowers were die cut from Marianne design Creatables # LR0131 die (www.mariannedesign.nl).  

Wednesday, March 6, 2013

A birthday card for a little 6 year old boy at my church.  The airplane is a free online image.  I embossed the background with an embossing folder.  The "6" and the "stars" are stickers.  A strip of red with white dots paper was added across the bottom.  I hand-cut the clouds, colored and put dashes around the edges, and then embossed them with a Swiss dot embossing folder.  I cut the corners at the top with some fancy scissors.
Another card for a boy in my church.  The background is done with wood-grain paper and is then embossed with an embossing folder.  The basketball, hoop, and shoe are free online images.  The basketball is also embossed with an embossing folder and the hoop has some mesh that I put in it.  
It's with sadness I had to make this card as I had to say goodbye to a dear, sweet lady.  My neighbor and friend, Caroleene, lost her 93 year old mother, Barbara.  Barbara was a spunky lady with a lot of personality and she was always fun and laughing when I was around her.  I will always remember her "dancing" and her delightful ways.  And now I KNOW she is dancing on the Streets of Gold up in Heaven.  She was a Christian and was well loved!  I will miss you Barbara!!!  Rest in the arms of Jesus! :)

Monday, January 28, 2013

I started this card with plain pink card stock, added a strip of pink/purple background paper that was edged with a Martha Stewart edge punch.  I added the sentiment with my card program and added a flower and some skeleton leaves (My favorite!).  The leaves are Marianne Design Creatables - Flower and Leaves.  The flower on the card is NOT made by Marianne Design - I don't know who made the flower as it doesn't say on the stamp.  I finished the card off with a little piece of bling inside the flower, a little shiny butterfly, and some dashes around the edge of the card.

Friday, January 11, 2013

KINDNESS: Pass it on!  This is a button that Craftymumz Creations has requested that we put on our blogs to help spread kindness.  You can also use it on your blog.

Wednesday, January 9, 2013


I saw the idea for this card online and for the life of me I cannot remember where.  I call it my "Folded Front Card".  I thought the idea was so unique that I just had to make one.  The background paper with the hearts on it is double sided and I cut the paper from the left at the mid point in to the center point.  About 1/4" from the top and the bottom, the paper is folded back on itself so you can see the pattern on the back of the heart paper.  The flower is done with a rubber stamp that I added some bling to and colored the bling with an alcohol pen.  The leaves are from the "Maryanne Design Creatables Dies - Flowers & Leaves LR0156" set.  I love the leaves and I really like the way the card turned out!  Thank you to whoever had the original idea!!!

Saturday, December 29, 2012

I decided to make a winter card for a little boy at my church since  his birthday is in January and I have so many winter/snowman images.  It turned out sooooo cute!  
This is what I call a panel card.  The front actually has two panels.  
Where I have the big snowflake on the right side of the left panel, you can put any image and actually tuck the right panel under it to keep it closed.
In the photo, the panel on the right is actually part of the front.  To make this card, take a piece of card stock 8 1/2" x 5 1/2" and place it on your scoreboard left to right from 0" to 8 1/2".  Score at the 1 1/2" mark and again at the 5 1/2" mark, and then fold the card on the score lines.  On the left panel I glued some snowflake background paper.  On the right panel all I did was score it with my scoreboard vertically every 1/8"  There is room for six vertical score lines on the right panel.  If you click on the photo it will enlarge and you you will have a better view of  the vertical score lines on the right panel.  In my card program  
I added a saying on a piece of card stock, punched it with the Martha Stewart icicle punch, then added some glitter to the icicles, and some blue snowflakes to it.  I also added some more snowflakes, along with one large layered one.  The snowman is a free online image that I colored in Gimp (Gimp is similar to Photoshop.  It is a free program that you can download from online and you can do sooooo much with it.)  I cut out and raised up his hat, nose, and scarf.  I also added glitter to the large snowflake and to the snowman.  And last, but not least, I added some little wiggly eyes to the snowman's face.

HAPPY BIRTHDAY NATHANIEL!

Tuesday, November 27, 2012

HAPPY BIRTHDAY SKYLER!!!


This card is for my grandson, Skyler.  Skyler just turned 13 years old!!!  I can't believe he's a teenager already!  Wow!
Many, many months ago Skyler told me he wanted a San Francisco Giants card in orange and black and he wanted it embossed with an embossing folder, so this is what I came up with.
The "2012 World Champions" was done as a water mark in my Printshop 6 card program, and the "San Francisco Giants 2012" was printed over that in the same program.  I then glued on the baseball at the bottom which was a free online image, and then I did the embedded embossing technique with a Sizzix diamond embossing folder.  I typed out the Happy "13th" Birthday Champ! in my card program and cut and then embossed it with a Spellbinder's oval die, and raised it up with foam tape.
Skyler was VERY happy with the card!  :)

HAPPY BIRTHDAY LARRY!!!
I play cards once a week with three of my neighbors and we have a lot of fun and a lot of laughs.  I made this card for Larry's birthday.  
The Happy Birthday background was done in my Printshop 6 card program.  The decorative border below that was done with a Fiscars border punch. and the embossed diamond background was done with a Sizzix embossing folder.  The cards (Aces) were a free online image that I printed out, cut out, and raised up with foam tape.  The little Game On tag was made with a Provo Craft die.  I added a little baker's twine, and walla!!! it was done!!!

Sunday, November 4, 2012

HAPPY BIRTHDAY DILLON!!!

Just a simple, but cute card this time.  I'm happy with the way it turned out.  

The top and bottom images were free-online images.  

Dillon in the middle was done in my card program.  

The balls on the bottom were cut out and raised up twice to give the card a little dimension.

Sunday, October 28, 2012

This card is made with a free online image from Dearie Dolls Digi Stamps:  http://deariedollsdigis.blog.com .  I really LOVE her site.  She has some AWESOME images and they're all free.  This particular image is called Dearie-Dolls-Boy-with-Frogs.png. 
 For me, I found that the best way to color my online images is with the Koh-I-Noor Woodless Colour Pencils (Available at Michaels Craft Store).  The first time I colored an online image, I noticed the black lines that make up the image faded a little.  So after I color the image I put it back through the printer a second time and the image just pops!  Then I cut the image down to the size I need for the card.
The saying "Have a Hoppin' Happy Birthday..." around the edge was done in my Print Shop 6.0 card program (Love it!).  The red background paper is embossed with an embossing folder.  The little boy image is mounted on a piece of blue and white gingham background paper.  The large frog is a sticker that I purchased at a craft store.

Saturday, October 6, 2012

I just love this image of a little boy climbing up into his tree house. I was raised with mostly boys in my family, and mostly boys in my neighborhood, so I did all the things the boys did too, so this image takes me back a few years.  Oh the joys of childhood!
This is a free online image from http://www.activity-sheets.com.
There are tons of wonderful images on this site.
I always color online images with my Koh-I-Noor colored pencils.  If you use markers on these images the printer ink tends to bleed.  These are the BEST colored pencils I've ever seen, as they have a very soft lead and color very nicely.
The HAPPY BIRTHDAY on the right side of the card was done in my Printshop 6.0 card program.

Here's the site for this free image:
http://www.my-coloring-pages.com/summer-coloring-pages/gallery/image/boy-in-his-treehouse/

Wednesday, September 19, 2012

I wanted to get this post in before the day is over.  I made this card for a little 8 year old girl at my church.
From the background up, this was a free-online decoupage sheet.  I raised up the saying, the flower and the two little bows.
The Happy Birthday is a "1995 Annette Allen Watkins #A1129 Happy Birthday" stamp.  It is one of my favorite Happy Birthday stamps because it is cute, little, and it fits into smaller areas than a lot of other HB stamps.

Thursday, August 23, 2012


EMBEDDED EMBOSSING:

This is the first time I've used this particular technique and I LOVE the way it turned out.  I glued the circles onto my yellow card stock and then ran it through my Cuddlebug Birthday Embossing Folder.  It is very important that you bring the glue to the very edge of each circle, or it will lift and won't look as nice.  


Tuesday, July 17, 2012

My friend Sue is a quilter, so I made this card for her birthday.  
The sewing machine is a free online image.  I added some quilt background paper on the left, some Spellbinder die layers, a saying, and some ribbon.
This is the inside of Sue's birthday card.

Oh, by the way, Sammy was beloved dog!  
I just finished this card today for another little girl at church.
I used my "Scrap Layering" technique on the bottom layer.  My base card is a dark blue.  I glued small pieces of scrap floral background paper onto the base card all around the edges, and then added the blue floral background on top of that.  The blue floral background was run through a Sizzix embossing folder and then I ran some sand paper over the flowers which brought out the light blue core color of the paper.  The ovals were cut with Spellbinder's dies, as was the Happy Birthday ribbon banner.  The angel is a free decoupage from online which has four layers to it.
This is a card I made for a little boy at my church.

I used a free online image that I colored with my markers.  I drew in the sidewalk and added dots on it.  The grass has been punched with a Martha Stewart's grass punch.  The clouds were hand cut, inked on the edges, and then run through my Spellbinder's Swiss Dots embossing folder.
Another card for a little girl at my church.  I simply punched out several heart shapes and made flowers with them.  I also cut a couple of the hearts in half to make the leaves on the stems.  I had cut and crimped the stems.  
The center of the flower contains another little punched flower and a green bling.
I always keep an unused pencil eraser on hand, which I used to make polka dots with.  Then I added some glitter to the center of each dot.
A small Happy Birthday was added to the bottom right.

My friend Sue's little dog, Sammy, just passed away.  Sammy was a sweet little dog and he will be missed!

I wish I had taken a photo of the back of this card as there is a little dog with this huge bone in his mouth.  Sammy was a Maltese and was not a very big dog - he only weighed a few pounds.  I was at Sue's house one day when Sammy came into the room with this BIG bone he had found outside in the back yard.  Sue doesn't even know where the bone came from.  Sammy was just prancing around the house with this huge bone in his mouth.  He was sooooo proud of that bone!  It was such a cute thing to see!
This is the inside of the "Sammy Sympathy Card".

This is the birthday card I made for my son Corey's 39th birthday.  
Wow I can't believe he's 39 already - where did all the years go?????

HAPPY BIRTHDAY, COREY - I LOVE YOU!!!

I tucked a gift card in the pocket!

Friday, June 29, 2012

A little girl from my church just turned 11 and I made this card for her.  
The awning is done with little pieces of paper that I cut and glued on top.  I added some little cut-out cupcakes that were from a clear-stamp set from Michaels Craft Store.  Unfortunately I don't keep the names of everything as I don't have room to store all the extra pieces of paper - I have a very small stamp room and it is pretty packed in!  I am blessed, though, to have just enough room for two people to make cards, which is nice!  I have a box that I store my clear stamps in and it's almost full now too.  Oh what to do!
I added another piece of paper at the bottom which I trimmed with my edge trimmer.  I believe the trimmer is made by EK Success.  It doesn't actually have a name on it, but it looks like all the other EK Success trimmers I have.
The "Happy Birthday Hailey!" was done in my Printshop 6.0 card program and the font is LuvCountryArt.  After cutting the piece of paper for the saying I ran it through my Swiss Dots Cuttlebug Folder and colored each dot pink.
As a last thought, I added some little purple dots behind the cupcakes and a little purple ribbon to the bottom of the card.

Monday, June 25, 2012

My sweet little granddaughter just turned 15!  I can't believe it!  She's such a beautiful young lady - inside and out!  
She wanted me to make her a card with zebra and leopard animal prints, lots of bling, and glitter.  I thought: wow, what in the world will I make with zebra and leopard animal prints on the same card???  Well, this is what I came up with.  She loved it and I was pretty pleased with it myself!  :)
The flowers were from a clear-stamp set from Michael's Craft Store.  I stamped the images onto leopard and zebra BG paper, colored the pink ones, cut them all out, glittered around the edges of each one, and added a little clear bling to each center.  The white background (BG) was done with my Swiss Dot Cuttlebug Folder and I colored each dot pink.
The stem in the BG is actually stamped with 3 clear stamps from Close to My Heart #C1397.  This is a very cute set.  There are 9 flowers, 4 stems, several leaves, and two sayings in the set.  
Here are a couple that I've been working on for the kids at church:


And this one went to my friend Phyllis for her birthday...I call her the "Big Pill"...Don't know why, other than she's a pill...LOL!  Actually, she's an AWESOME friend! I'm blessed to have her in my life!  
This little card I tri-folded, added some Spellbinders hearts, a couple of EK Success butterflies, some BG  paper, and a bow.  Pretty simple card.  Also, after I photographed this card I rounded the corners on the two inner flaps that meet under the heart as it softened the look of the card.

Saturday, June 9, 2012

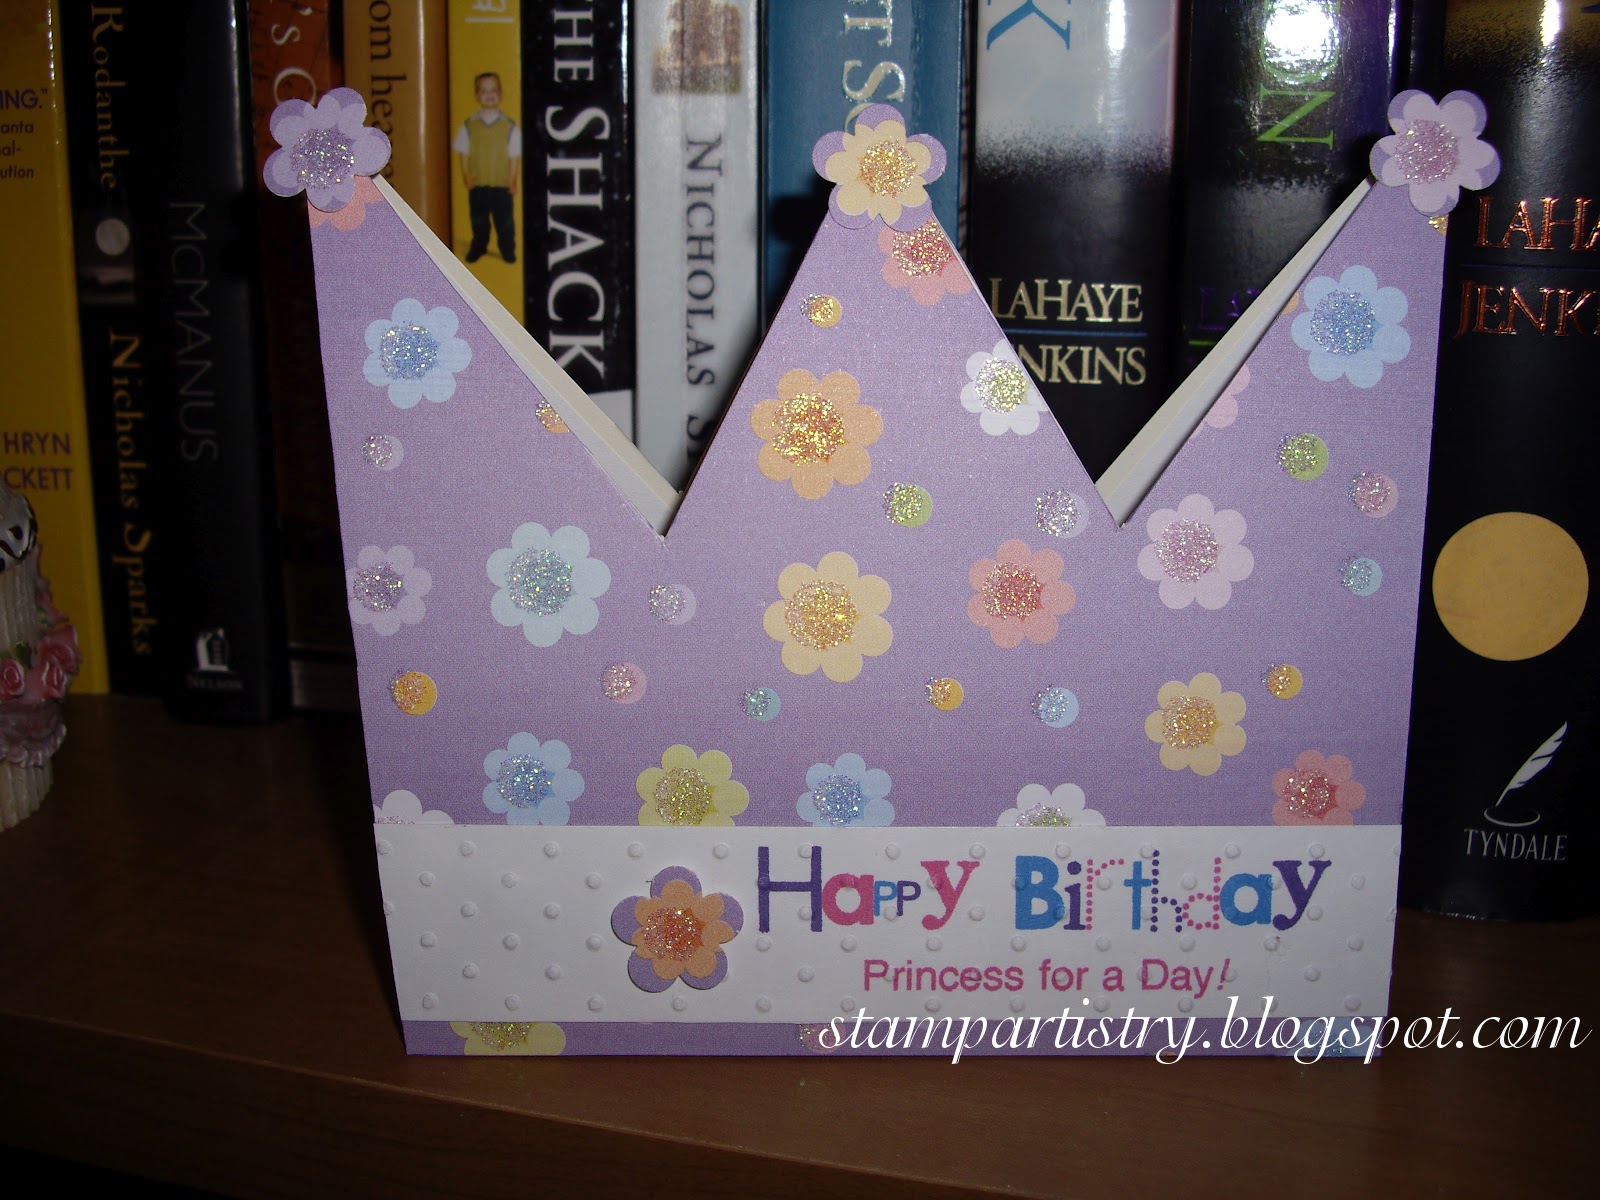
A cute little crown card for a sweet little girl!  I simply drew out the crown on a piece of card stock, cut out a card, covered it with BG paper and added some little flowers and a saying.